Problem
XM Cloud comes with a sample workflow that should not be used as an actual configuration but as an example of a simple workflow. Workflow helps customers prevent unplanned content from making it to their website without the proper approvals. It also helps maintain consistent quality across all content. Each step in the editing process—such as fact-checking, style alignment, tone consistency, and further reviews—ensures that the content meets specific standards.
Solution
Workflow Planning
It's recommended to establish a workflow for all content items. This prevents premature publishing to your production environment, whether done automatically or manually. While the sample workflow is provided, it should only be used as an example or template for designing a workflow that fits your business needs. Maintain simplicity in your workflow. Overcomplicating it with numerous states and review levels can slow the process, resulting in a less effective workflow.
Migration Considerations
If you are currently on XP/XM and migrating to XM Cloud, there are specific considerations to address. Two key focuses should be:
- Any .NET customizations affecting items controlled by workflow.
- The introduction of webhooks, which offer new ways to implement workflow.
Changes to Consider
- Email Actions are no longer supported. Replace them with a Webhook Submit Action.
Configure Page and Datasource Workflows
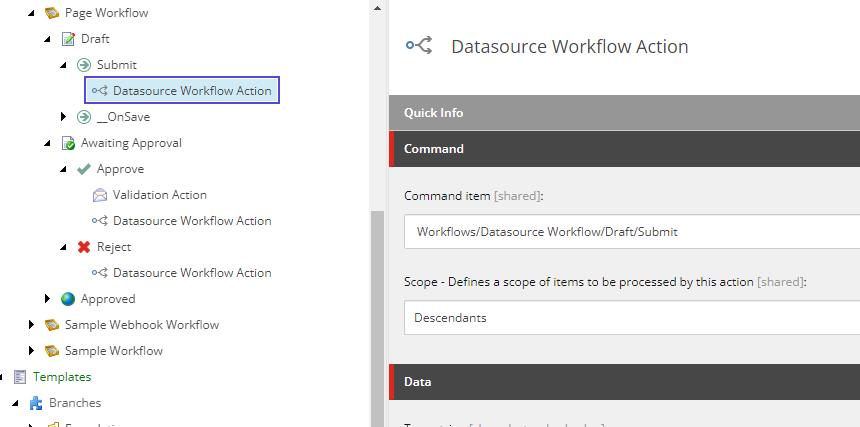
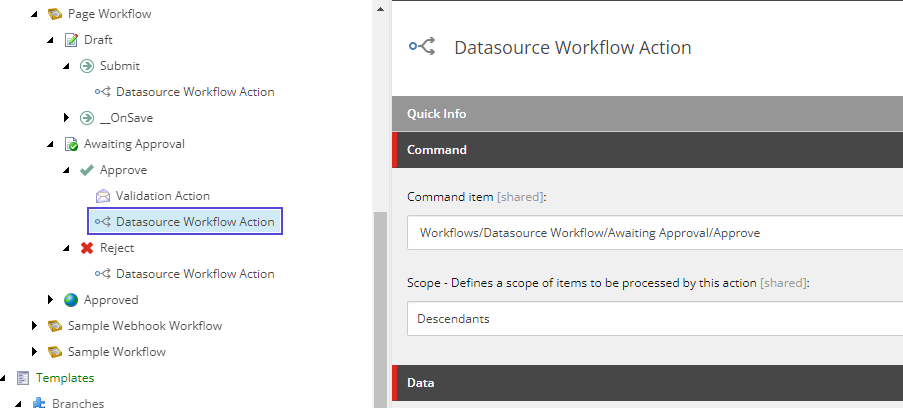
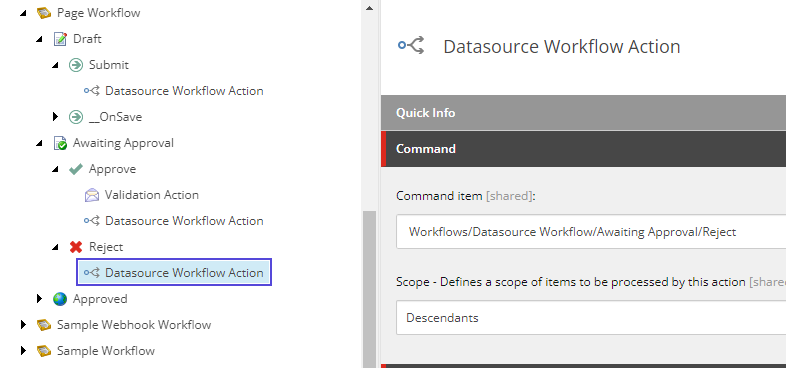
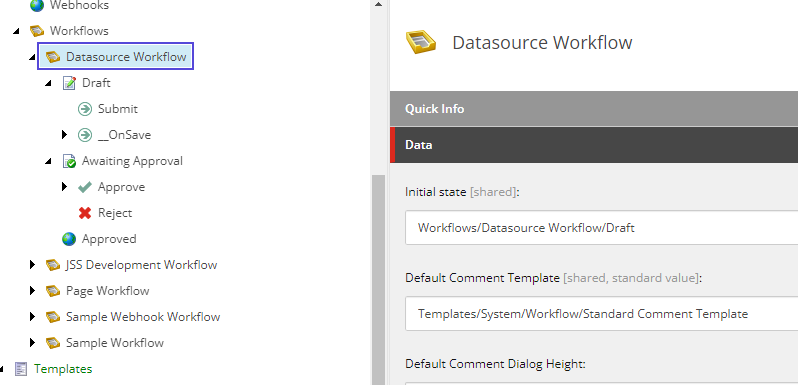
Two separate workflows are recommended, one for page items and the other for datasources. This allows the main page workflow to stay clean and not cluttered. At a minimum this would be a two stage with draft and approved. The Page Workflow has a Datasource Workflow Action which points to the Approve command on the Datasource Workflow. This is important because it allows you to define the scope which allow datasources like the link list and its child items for example to be moved through the workflow successfully.
- Create a page and datasource workflow and define your states.
- If you have configured your workflow states similar to the sample workflow you will need to insert datasource workflow actions to Submit, Approve and Reject actions.
- For these actions you can specify the Scope to determine what child datasource items should be processed by this action. These should point to the corresponding action in the datasource workflow. See below examples for more information.
Assign Page Workflow
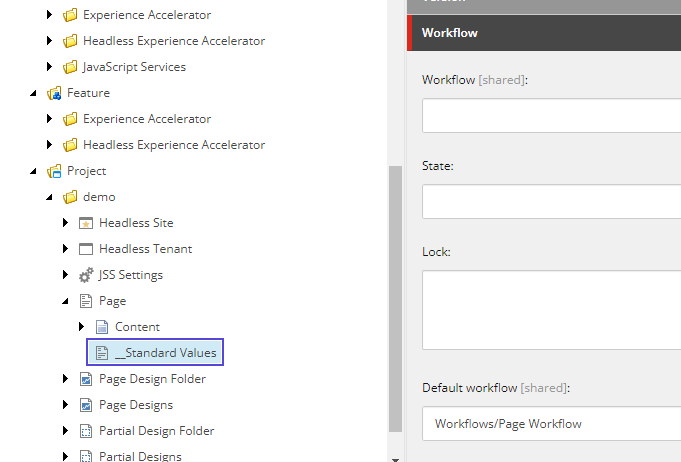
- Assign it using Standard Values to the page template.
- Enable
View > Standard Fieldsin the Content Editor. - Go to the Workflow tab and set the Default Workflow to the workflow you created.
Assign SXA Datasource Workflow
It's important to configure workflow for both pages and the separate data source component items on a page. To do this:
- Ensure the Standard Values module is installed for your SXA website.
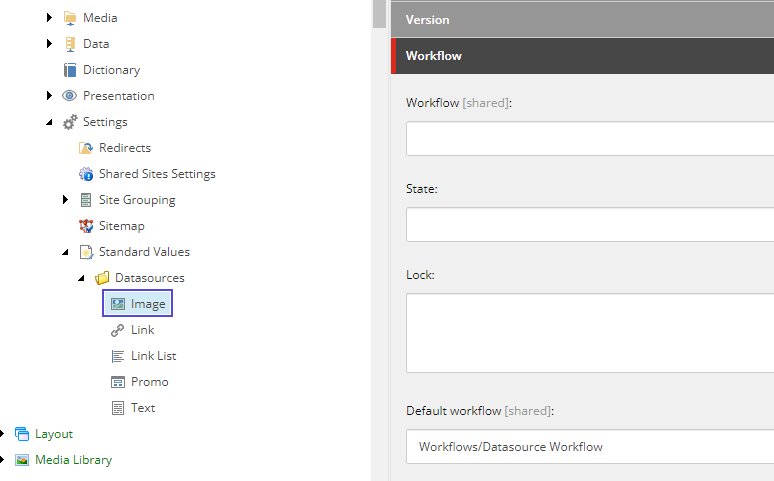
- Navigate to the Content Editor and define your components under the Standard Values item in the SXA website settings folder.
- Right-click on Standard Values and click on
Insert > Standard Valuesto open a dialog. - Select the Datasource Templates tab and configure any unconfigured templates.
- For each data source component, configure the workflow the same way as a page.
Configuration of Users/Roles
For each workflow state that requires a specific set of users, create a Sitecore role representing the commands and states this type of user should manage. Assign roles to users rather than configuring permissions for individual users.
Example: Sample Workflow with "Editor" and "Super Editor" Roles
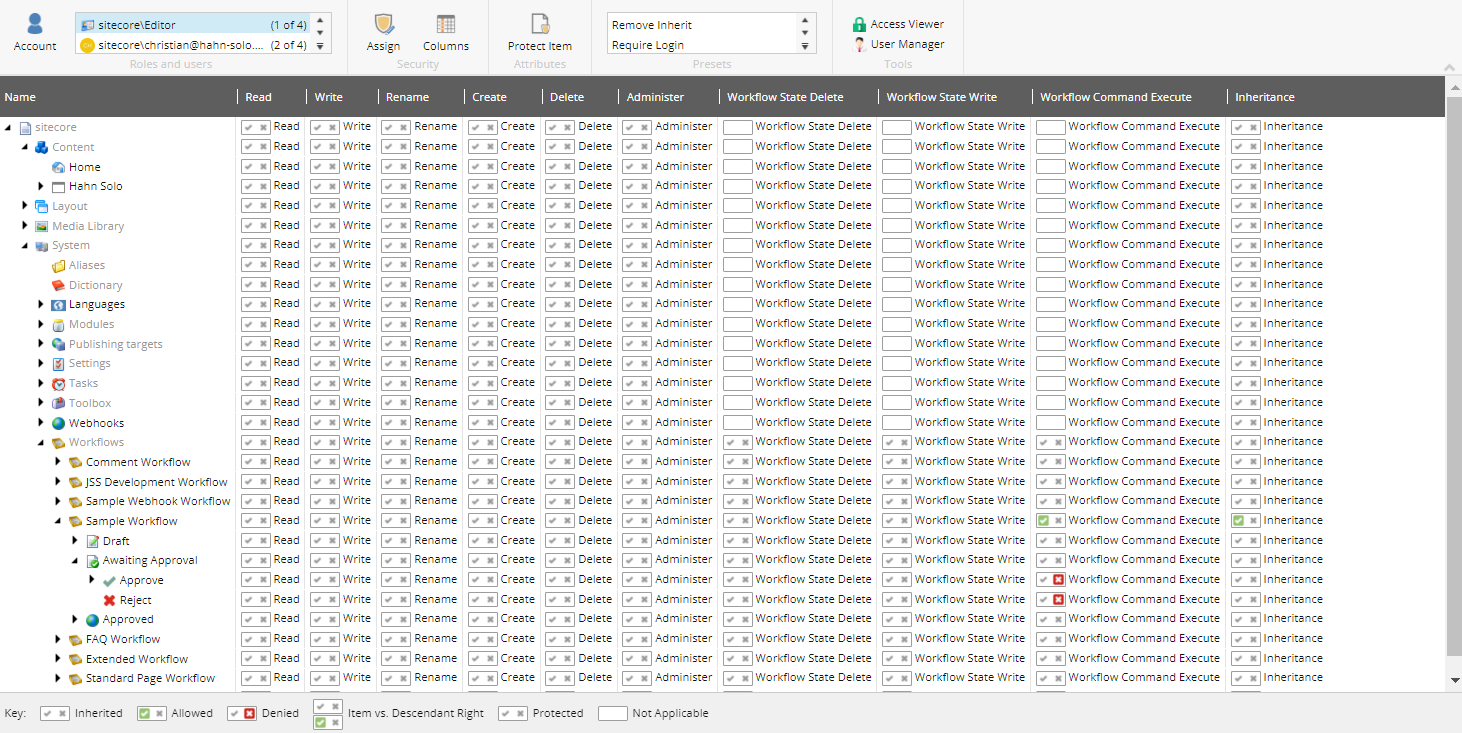
- Editor: Can push an item from Draft to Awaiting Approval.
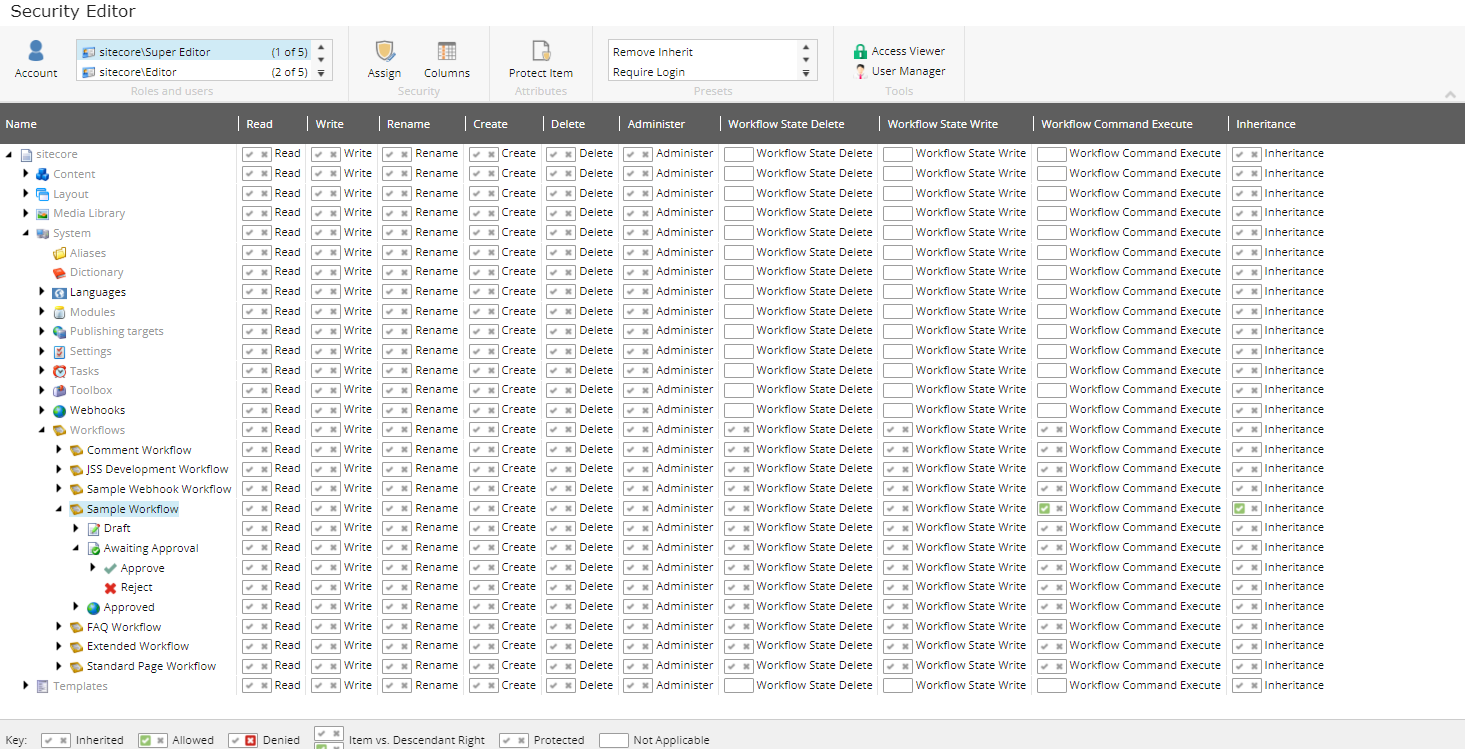
- Super Editor: Can approve or reject the item.
You can create these roles in the Role Manager and use the Security Editor to apply security settings.
Example rights for Editor

Access Viewer for Editor
As shown, Editors get workflow execution rights, but Approve and Reject actions are specifically denied.
Example rights for Super Editor

Access Viewer for Super Editor
A Super Editor has full workflow execution rights with no restrictions. When an Editor pushes an item, it will stop at Awaiting Approval, while Super Editors can push the item further.
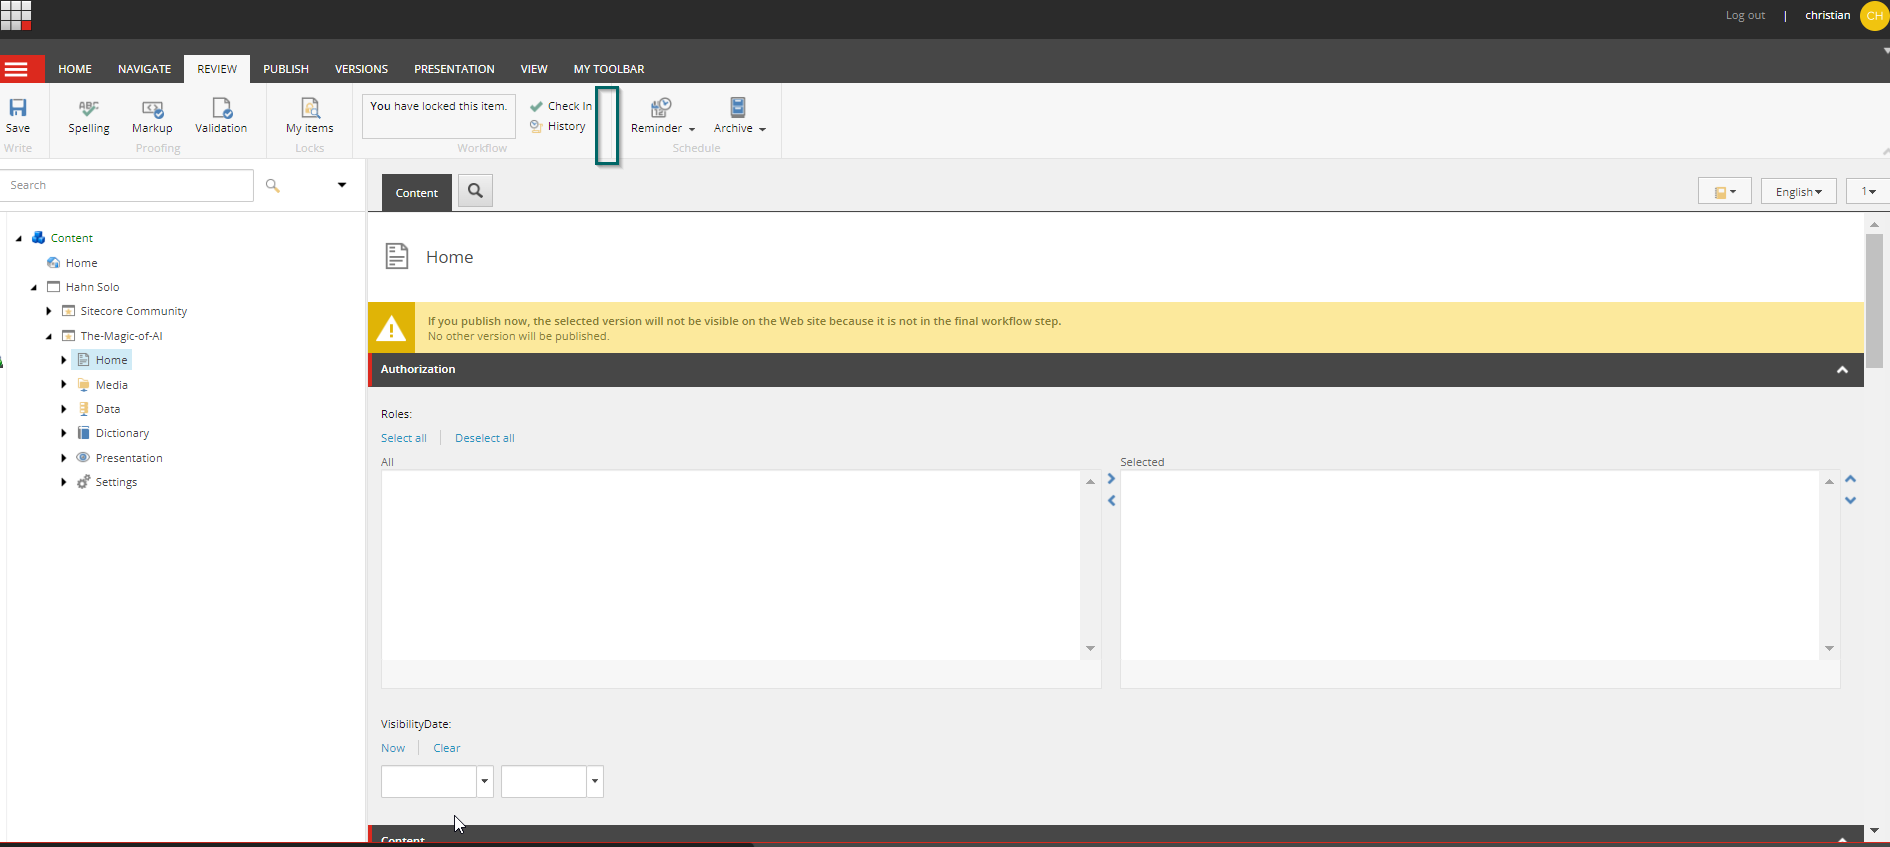
No further workflow options for Editor
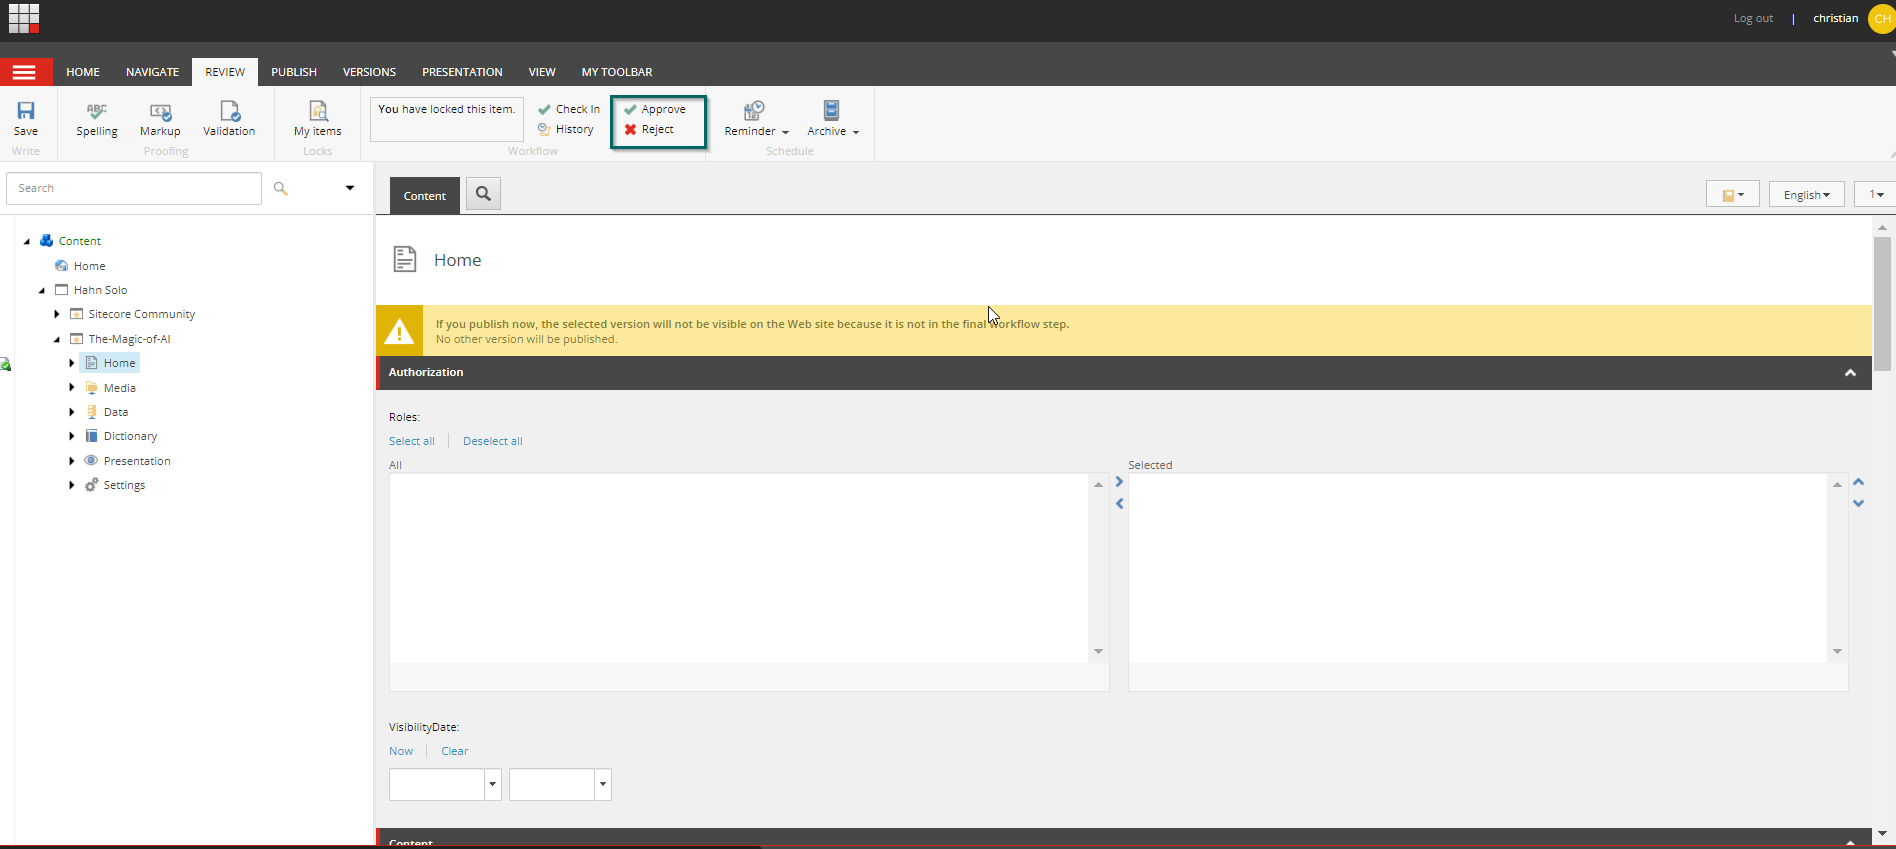
Further workflow options for Super Editor
It’s also advised not to assign the Administrator role to content editors, as administrators can override workflow states and interfere with normal operation.
Using Webhooks to Send Notifications
You can now trigger sending emails or notifications via webhooks when an item reaches a specific state in the workflow. Follow the steps below:
-
Create a new Webhook Submit Action under a specific state or command.
-
Example payload sent by the webhook:
{ "ActionID": "2f00a4eb-9b5a-4d15-a541-dd4e1bad73dc", "ActionName": "Name", "Comments": [], "DataItem": { "Language": "en", "Version": 4, "Id": "f0b5226d-14ce-4dad-9b7b-37539d45ed7c", "Name": "Home", "ParentId": "43bd6a7c-b8a8-4c07-8935-123fe1d0d2a1", "TemplateId": "4d4931c1-2ecf-4a27-a5ce-edbe6237e0d0", "TemplateName": "Page", "MasterId": "45cf9f42-b3ac-4412-aab9-f8441c7e448e", "SharedFields": [], "UnversionedFields": [], "VersionedFields": [] }, "Message": "", "NextState": null, "PreviousState": { "DisplayName": "Draft", "FinalState": false, "Icon": "Software/16x16/jar.png", "StateID": "{721CD32A-7489-475E-9C7A-24C8C7DE1DE5}", "PreviewPublishingTargets": [] }, "UserName": "sitecore\\john.doe@example.com", "WorkflowName": "Simple Page Workflow", "WebhookItemId": "2f00a4eb-9b5a-4d15-a541-dd4e1bad73dc", "WebhookItemName": "Name" } -
The webhook sends a
POSTrequest to the specified URL. -
Configure the URL and authorization details for your endpoint.