Problem
My client has content or data in a 3rd Party system like products in a PIM or Commerce System, assets in a DAM, or anything else from any system. I need to give the editors a way to choose and use such data visually via Pages Editor with WYSIWYG and inline editing capabilities.
Solution
Within this chapter we will not only cover how to properly offer 3rd Party integrations, but also explicitly highlight ways, how we should not do it anymore in a modern composable XM Cloud architecture.
❌ DON’T
We will start with the way to deal with such kind of data, which was heavily used in the past. It was quite usual to build a backend integration between that 3rd Party system and the Sitecore Platform to first import or sync those data as Items into Sitecore. That way the data could be used the same way as any other Item in Sitecore, which fully supports inline editing via WYSIWYG.
Do not import or sync those data as Items into XM Cloud as it would cause massive unwanted and unneeded maintenance overhead afterwards.
✅ DO
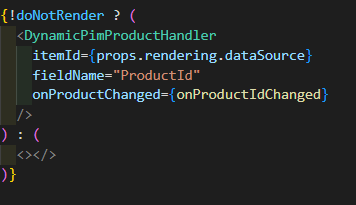
Instead of importing or syncing all the data to the Sitecore backend we will just store the external entity Id (or public link in case of an asset) within Sitecore and load all the necessary data directly in the head application. That way we only store the absolutely necessary data within Sitecore and keep the system clean and performant. To do so, it is enough to extend your Datasource with a new Single(Multi)-Line Text field to store that external entity Id (or public link). The head application will use that Id or link to load additional data on the fly, if needed. This can be done via SSG or SSR depending on the type of data or the use case.
One simple way to fill such Id or link is to let the editor copy & paste it from the 3rd Party system. But in case you would like to give the editors a more intuitive and visual way of choosing the data, you can easily build that piece of logic in the head application directly.
Pages editor is a SaaS application, which is currently not extendable with custom code as Experience Editor was.
Create an editing component
The table below shows a step by step guide on how to create a custom react editing component, which allows the editors to visually see the 3rd Party data and choose 1 or more of them. The result will be automatically saved back to XM Cloud Datasource item.
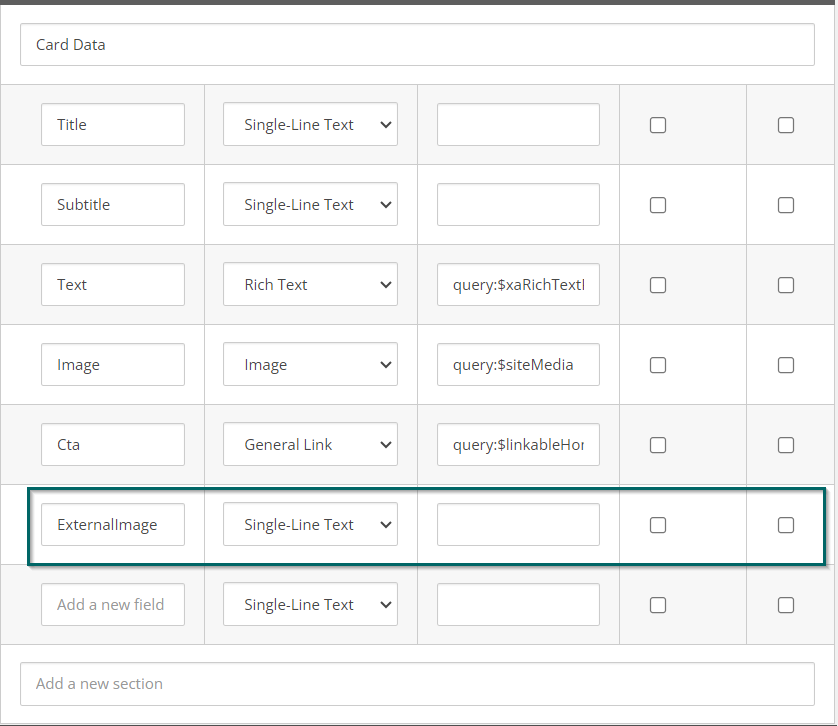
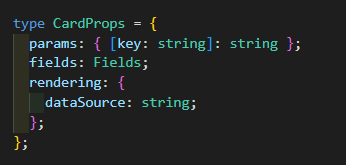
- Preparation: Extend the component with a new Single (or Multi) Line Text field to store the external ID or public link. Example data model of a card module.
Note: You can also use a multi-line field to store a list of external IDs or public links. You just need to adjust the code later on a bit to have this available in editing as well.
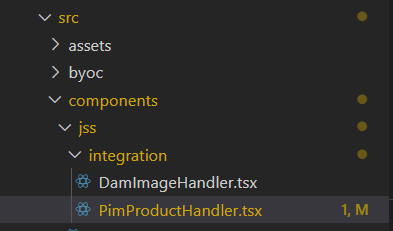
- Create a new (editing) react component: You can organize the editing (data handler) components for better maintainability.
- Implement the 3rd Party search / interaction: You can use a native rehydration mechanism to load/reload 3rd Party data via API. Example Implementation of Frontify Asset retrieval: Data Model definition
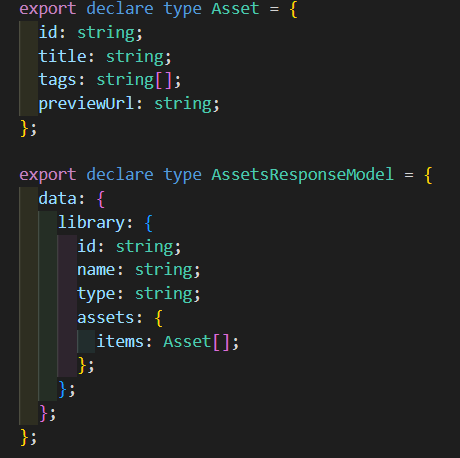 GraphQL Query construction (simplified):
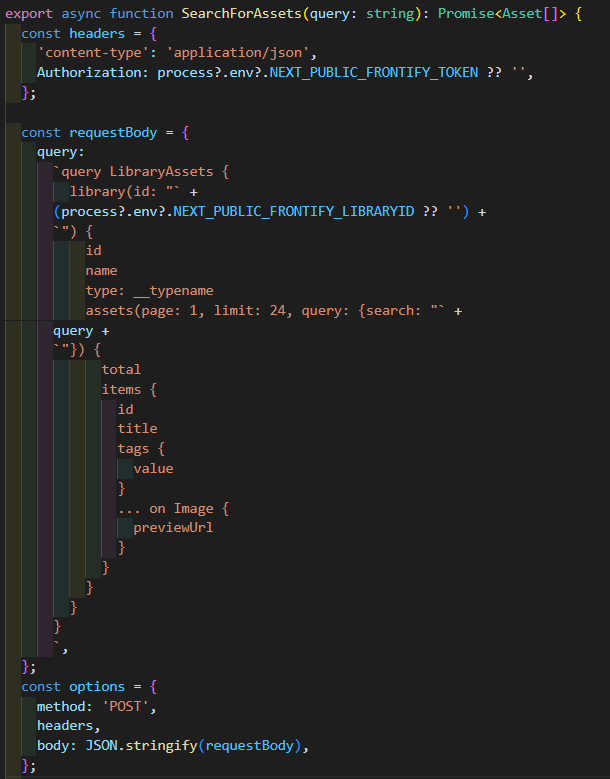 Once implemented, you can easily use the function
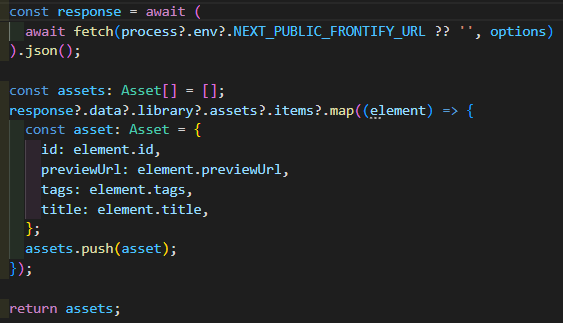
SearchForAssetswithin your editing component to retrieve the data to be displayed. - Provide a visual representation of the external data: Use the UI framework of your choice to provide a visual representation of the data and/or search capabilities. This could be a grid or list view displaying the basic data. Depending on the external service, you could provide full-text search, faceting/filtering, pagination, or more to ease the management process of such external data.
- Implement the GraphQL mutation back to XM Cloud to store the Id or link of the chosen external entity: Once an editor has chosen the right external entity, extract the needed piece of information (ID or public link) and save this back to XM Cloud via GraphQL Management API. Example implementation to update an item field with the new information: Update Item GraphQL Management API function:
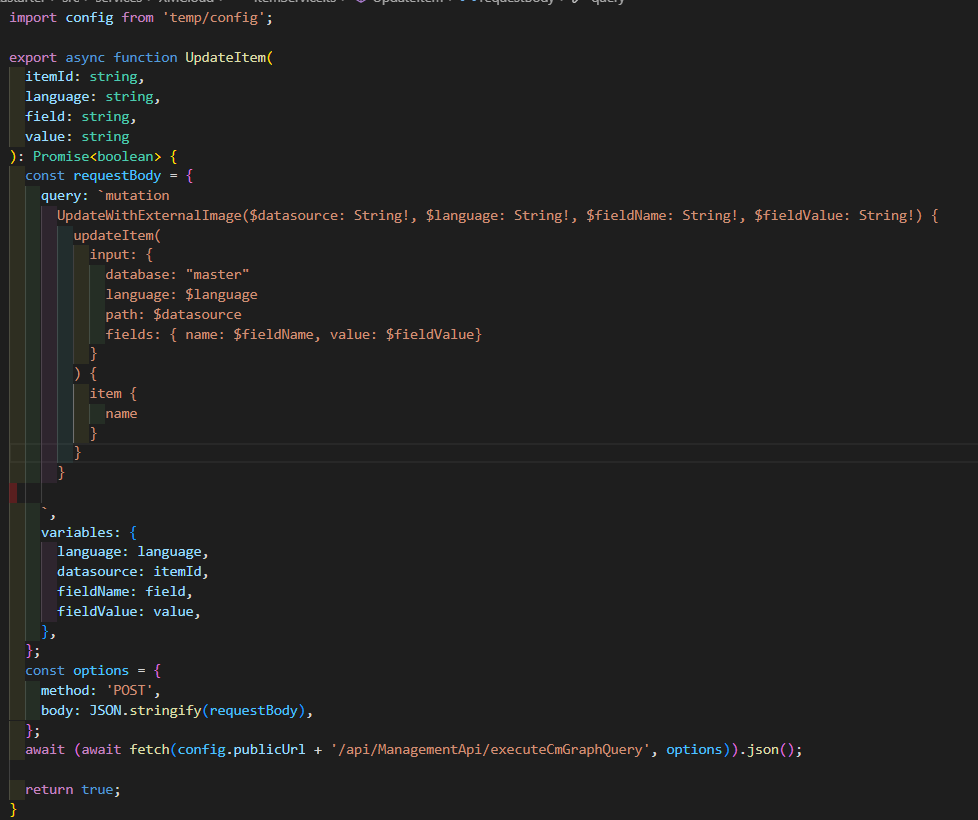 Store the chosen entity in a dedicated state for access on save, and grab additional information from Sitecore context or props from the parent component:
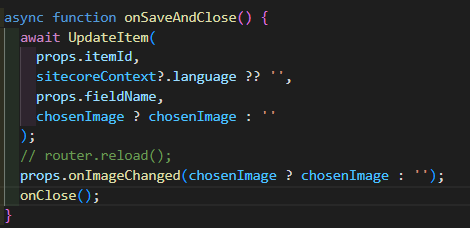 Use the name of the field created in step 1 as the field name in the GraphQL call.
- Optionally: Extend the component to immediately render the new data, once chosen. Normally, your rendering will not update automatically if you update the Datasource via API behind the scenes.
To see changes immediately while editing in real-time use either one of these options:
-
- Use the new reload button in Pages, which reloads the canvas without reloading the entire Pages application.

- Use the new reload button in Pages, which reloads the canvas without reloading the entire Pages application.
-
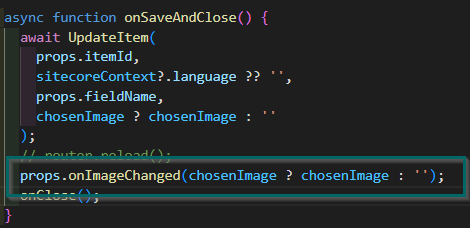
- Or Save the ID or public link of the entity in a special state variable and pass it to the child component to immediately react to changes. New state variable on the parent to store the ID or public link: Pass through the set functionality to the child component:
 The child updates that state on save, leading to a partial reload of the component to reflect the latest changes:
- Or Save the ID or public link of the entity in a special state variable and pass it to the child component to immediately react to changes. New state variable on the parent to store the ID or public link:
Additional Information
In case you want to keep the head application free of editing code, you can extend the webpack build to only include the new editing code for your editing. That way, your website code stays clean, secrets stay hidden, and the webpack bundles remain as small as possible.
Code Splitting
The approach here is called code splitting. With code splitting, you can tell the application to defer loading additional sources until needed. For example, in the editing host, we want to load the editing resources, but on the live site, we want to restrict that.
- Remove the actual import of the component:

- Create a new function to load the component dynamically via the
dynamickeyword:
- Add a condition in the code to load the component under specific circumstances (e.g., specific environment variable or edit mode):

- Replace the actual import with the conditional dynamic import function:
